
Web Portal: How to Assign Add-Ins
Each user can be assigned an add-in as long as there are available licenses. An administrator can add or remove an add-in for a user at any time from the Manage Add-Ins page.
Video Tutorial
Instructions
1. Login to our webportal at www.identillect.com Click on the Business tab on the left side of the screen and you will be directed to the Business page. Alternately, if you hover over the email address on the top right of the screen you will be presented with a drop down menu from which you can select the Business menu item.
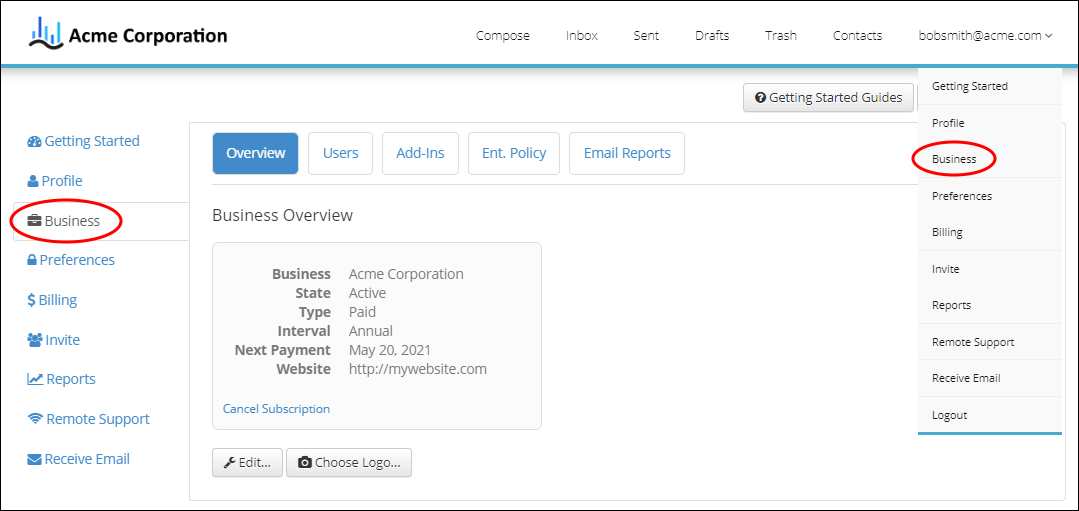
2. Click on the Add-Ins button at the top of the Business Overview page. This will bring you to the Manage Add-Ins page.
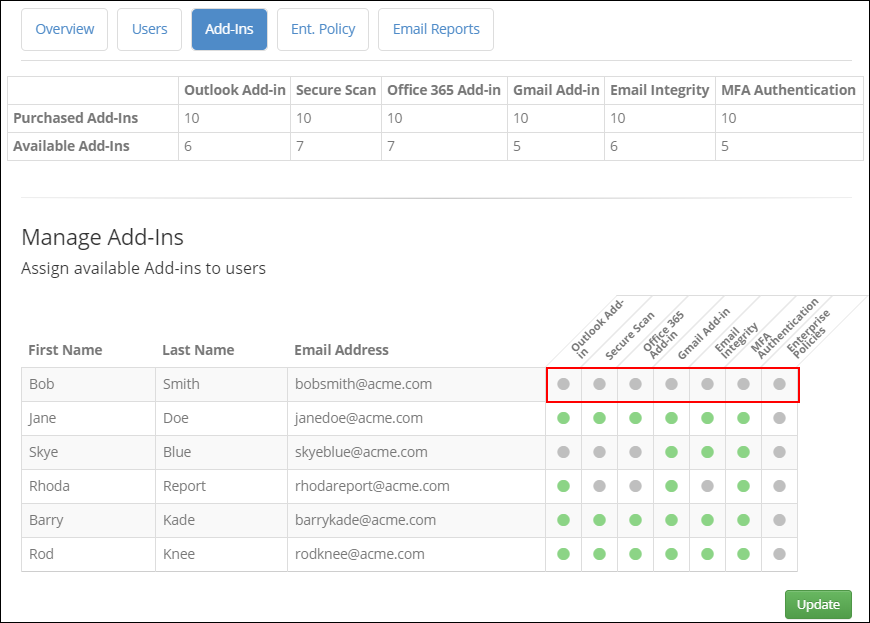
The top of the page will provide an overview of how many Add-Ins you have purchased and how many are still available to be assigned.
Below that there will be a list of users and the Add-Ins each has been assigned. For each user there will be a list of gray or green circles. A green circle indicates that the user has been assigned that particular Add-In. A gray circle indicates they have NOT been assigned that Add-In.
In order to select or deselect an Add-In, simply click on the circle to toggle on or off.
Once you have made your necessary change click the Update button.
Related Topics
Web Portal: How To Add Business User(s)