
Outlook Add-in: Re-Installation
Keywords: Re-Installation, Installation, Install
Sometimes it's necessary to re-install the Outlook Add-in because of errors or installation problems that could not be resolved by any other method. If this is the case then the Outlook Add-in must be completely removed and re-installed from scratch.
Video Tutorial
Instructions
Before you begin make sure that Outlook is closed.
In order to do this you must be familiar with how to uninstall applications from your version of Windows. The following instructions are for Windows 10. The process will be similar on prior versions of Windows.
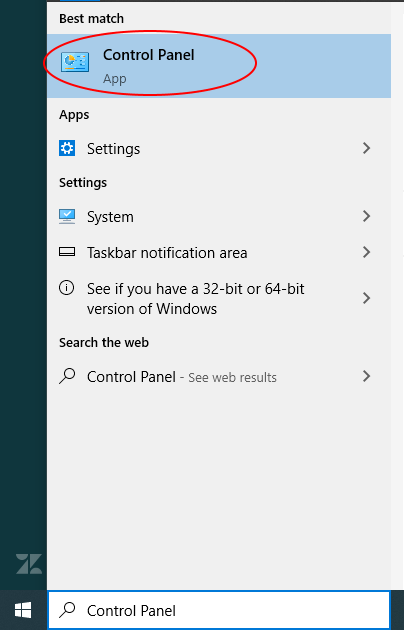
1. Uninstall the Add-in. Go to the search box on your toolbar.

2. Type in the words Control Panel and select the application called Control Panel.
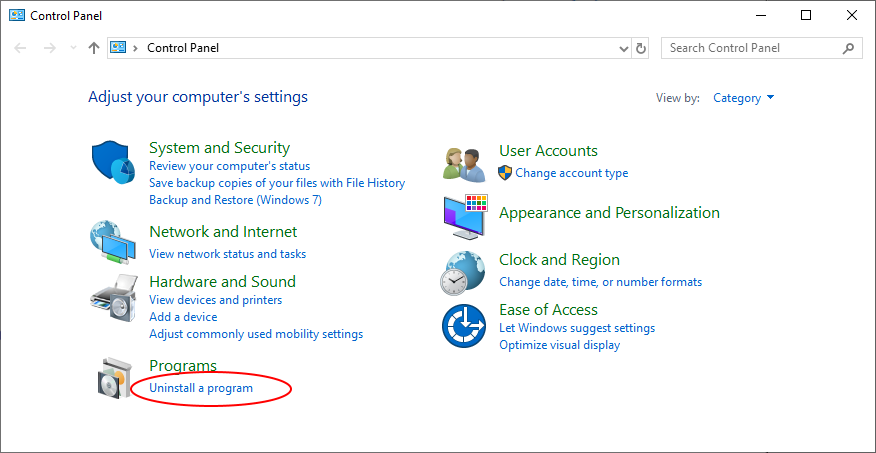
3. This will run the Control Panel. In the Control Panel click on the Uninstall a program link.
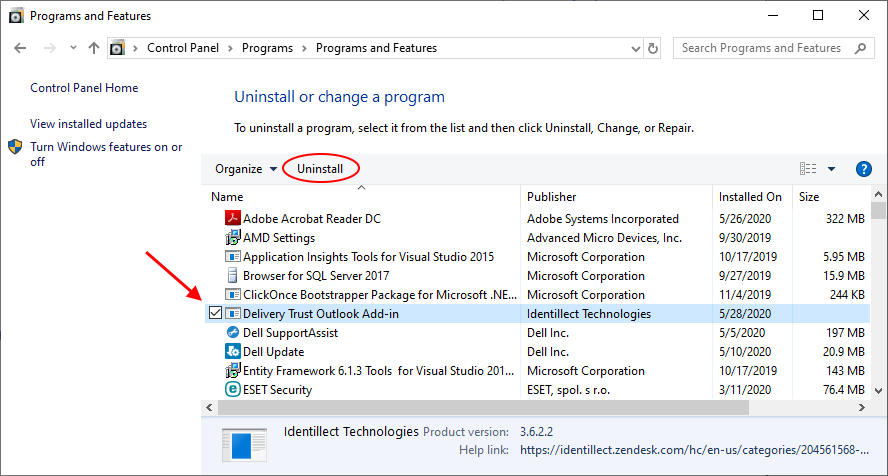
4. Search the list and check the line Delivery Trust Outlook Add-in and click Uninstall
5. This will uninstall the Add-in. Once this is complete you must remove any old Delivery Trust files. Open the file explorer. Which should appear as a folder in the Windows tool bar.

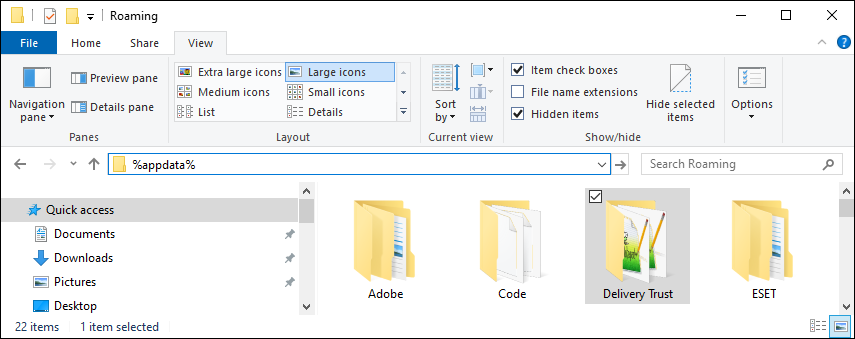
6. Use the File Explorer to navigate to C:\Users\username\AppData\Roaming\Apps\2.0 by entering %appdata% in the file path field. Delete the Delivery Trust folder.
7. Now you can re-install the plugin.