
Web Portal: How to Add Business User(s)
Adding a user to the web portal is a two step process. They must first be invited by an administrator. This will place the user in a pending state. The invited user will then be sent an email with instructions on how to set their password. Once the invited user completes this process they will become an active user. This will be indicated by them showing up in the Active User list. You will not be allowed to add more users than you have been licensed for.
Video Tutorial
Instructions
In order to access your Business settings, you must be logged into the admin web portal. 1. Access your admin Web Portal by navigating to identillect.com and selecting Log In at the top of the page.
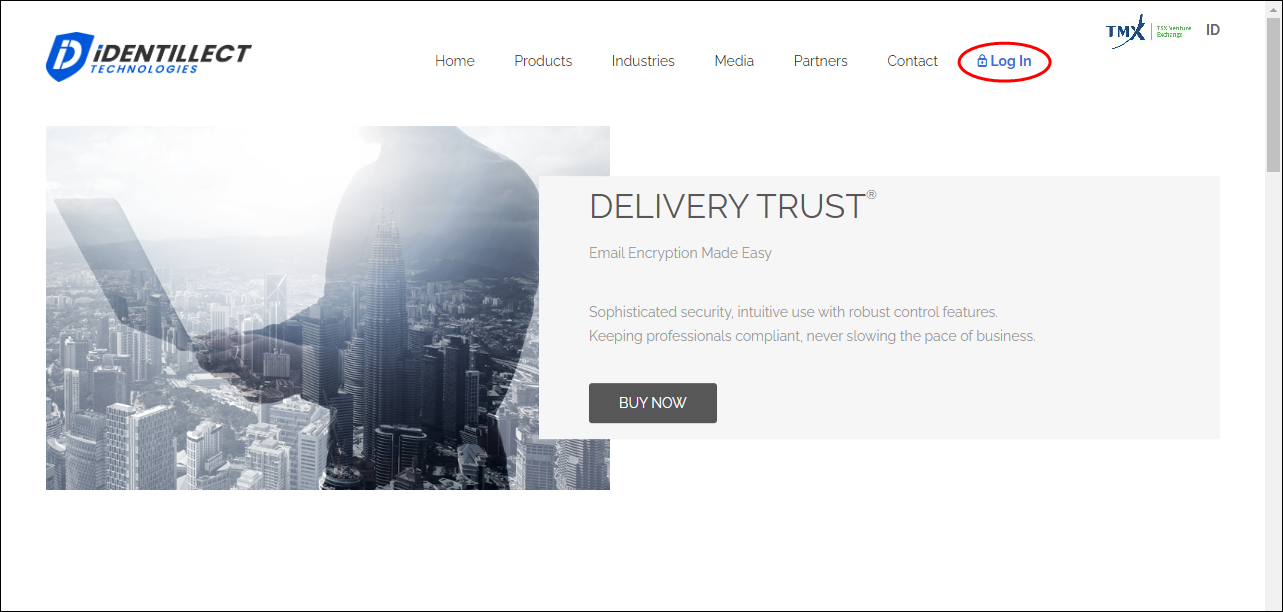 2. There will be two ways to get to your Business settings. The first is by clicking on the Business tab on the left menu. The second is by hovering over your email address displayed in the top right corner of the screen to drop down a menu from which you can click on the Business menu item.
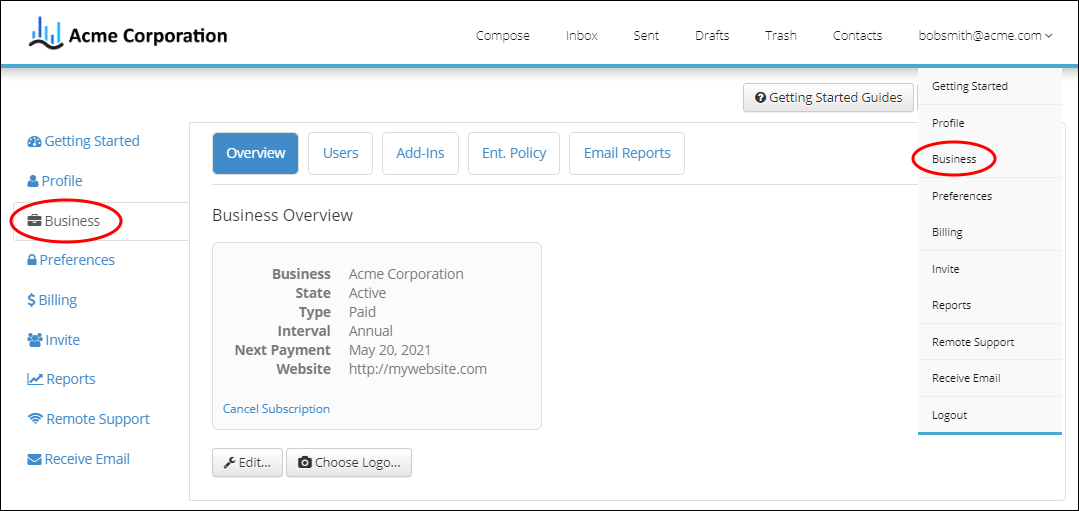
3. Click on the Users button at the top of the Business Overview page.
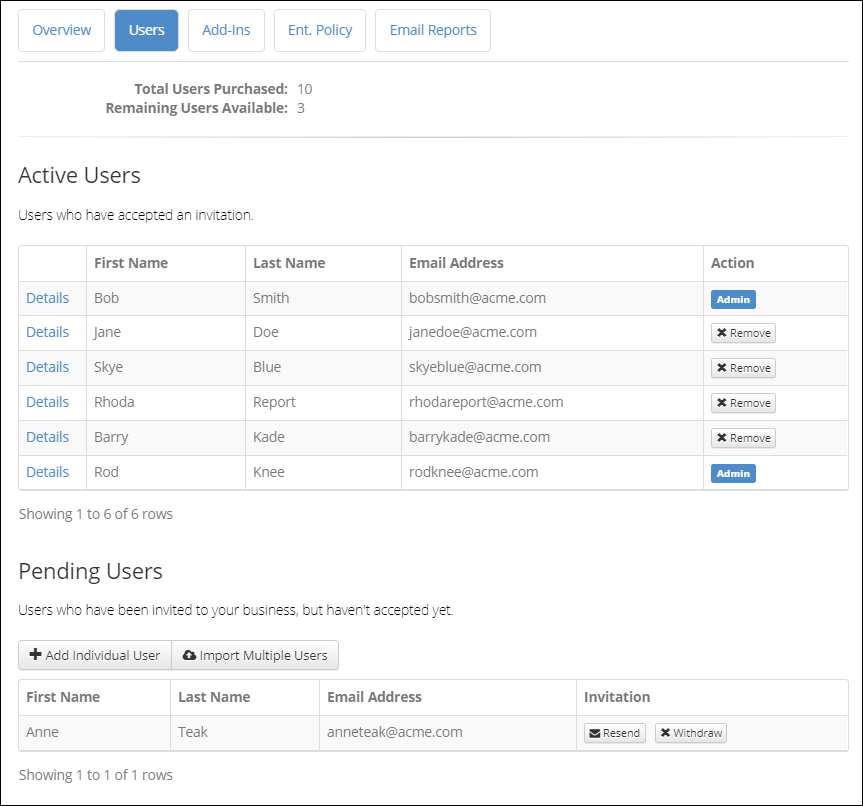
This will bring you to the Active Users page that shows all active and pending users. Active users are those users that have an active login and are authorized to use the system. Pending users are those that have been invited to use the system but have not yet "accepted" that invitation and created a login.
If you wish to remove a user from the Active Users list you can click on the Remove button at the end of the row.
4. Add a User(s). There are 2 ways to add a user. Individually or by uploading multiple users from a custom excel spreadsheet.
Add Individual User
Click on the Add Individual User button. This will show the Add Single User popup.
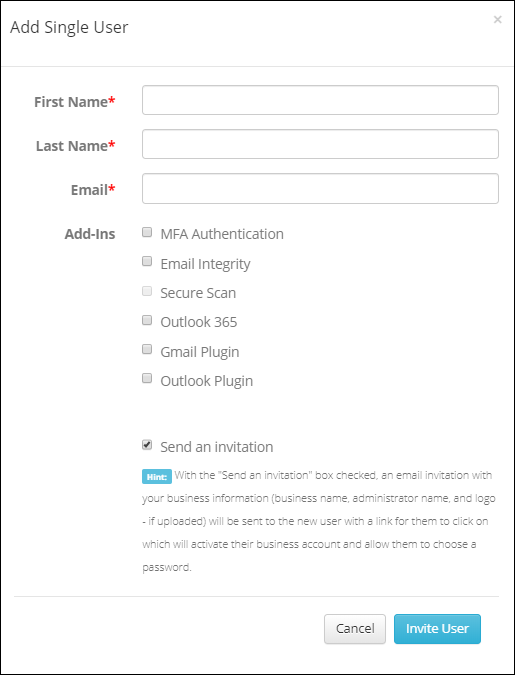
Fill out the First, Last and Email address of the user you want to invite. Then select the Add-Ins you want them to have access to. You can then choose to send them and invitation. If you send them an invitation they will be able to navigate to the Identillect portal and select a username and password and login. This will move them from a Pending User to an Active User. If you choose not to send them an invitation then they will remain in the Pending list until they are sent an invitation. This can be done by clicking on the Resend button.
You can also withdraw the invitation by clicking on the Withdraw button. If the invitation is withdrawn the invitation email will no longer be valid and the user will not be able to create a username and password.
Import Multiple Users
This will allow you to import one or more users from a template file. Click on the Import Multiple Users button. This will bring up the import popup. If you don't have the correct template file you can download it by clicking on the Download link. Once you have filled out the template file with the users you wish to add you can select the file by clicking on the Select file button.
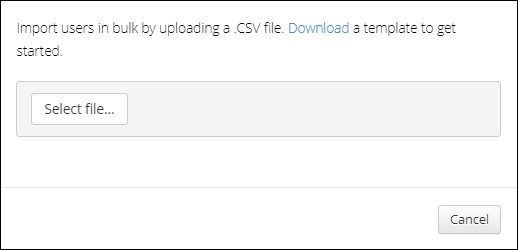
Once the users have been uploaded you can perform the same actions on them as if you had uploaded them individually (ie. Resend or Withdraw the invitation).
Related Topics
Web Portal: How To Assign Add-Ins