
Set up your email signature
Create a signature to add to your secure messages, and choose whether it's added automatically to new messages, replies and forwards.
Create or edit your signature
- Click the gear icon (Open settings) in the top-right corner, then go to the Email signature section.
-
Type your signature in the Default Signature box. Use the toolbar to change the font, size and style, align text, add lists and links, or Remove formatting.
- Your signature saves automatically as you type. To save right away, click Save.
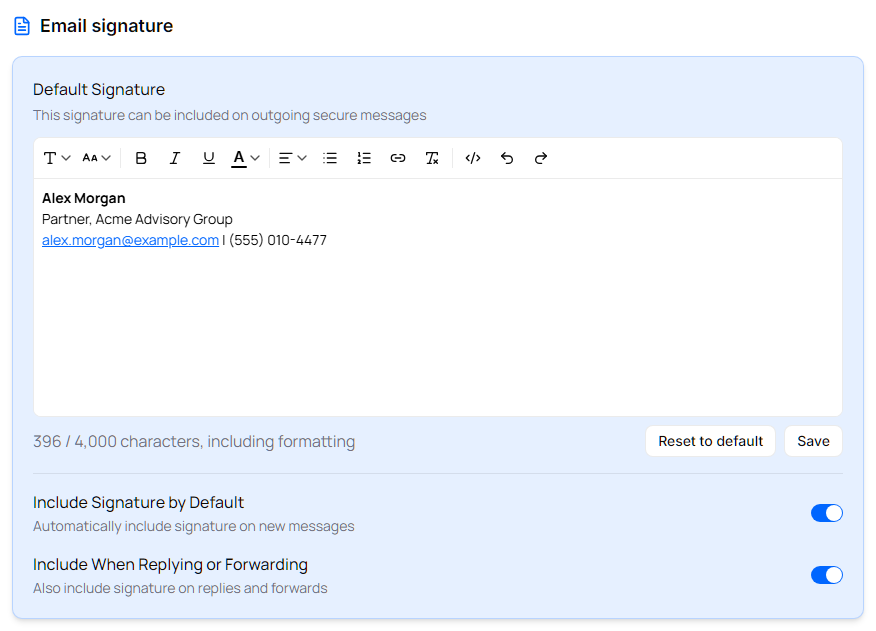
The count under the box shows how much of the 4,000-character limit you've used. The count includes formatting, so a styled signature uses more than its visible text. If you go over the limit, the signature isn't saved until you shorten it.
To start over, click Reset to default to replace your signature with a simple one that includes your name and email address.
Tip: To paste a signature you designed elsewhere, click HTML source in the toolbar, paste the HTML, then click Visual editor to see the result.
Choose when your signature is added
| Setting | What it does |
|---|---|
| Include Signature by Default | Adds your signature to new messages automatically. |
| Include When Replying or Forwarding | Also adds your signature to replies and forwards. |
The portal shows "Signature preference saved" when you change a switch.
Add or remove the signature on one message
In the compose window, click the Signature button (pen icon) in the toolbar:
- Select or clear Include signature to add or remove your signature on this message.
- Click Manage signature to open your signature settings.
Include signature is greyed out until you've saved a signature.